To build a form with PZForms (either version), you work within the regular WordPress editor and within normal pages or posts. You insert form elements until you’ve got the form you want.
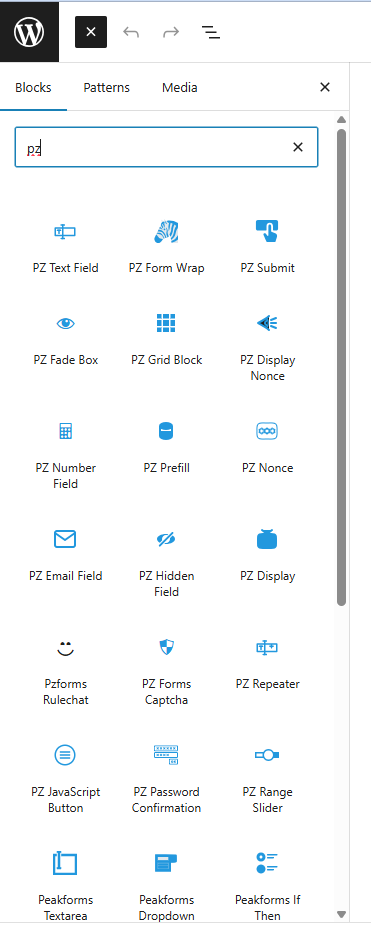
The first thing to do with every form is to insert a PZ Form Wrapper block wherever you’d like the form to appear. One fast way to find this block in the block inserter panel is to search for blocks that start with “pz” (all PeakZebra blocks start with “pz”).
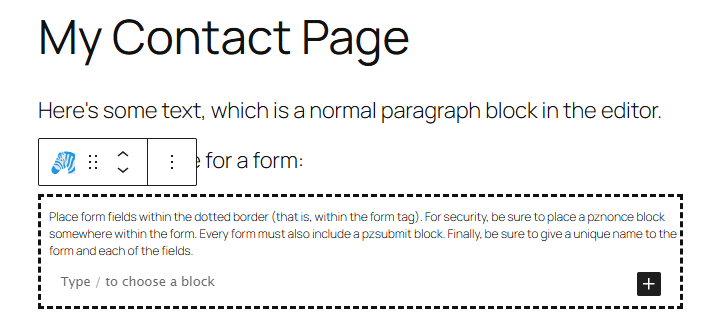
When you choose the PZ Form Wrap block, a box with a dotted border will appear on your page or post. All form elements will be added within this box (the dotted border is not visible in the front-end view).
Click on the block to bring up the block inspector panel (almost always on the right side of the screen). Some configuration of the form is needed:
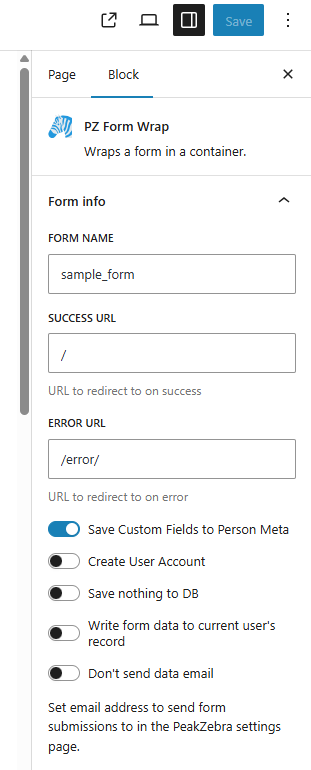
The “unique form id” should be set to a string (no spaces) that you don’t use as a form name anywhere else on the site. If you’re not adding your own programming to handle forms, this probably won’t matter, but it’s good practice to have each form be individually identifiable.
The “redirect here after submit” field should be filled with the URL where you’d like the user to wind up if all goes as expected after they submit the form. This can be a relative URL, like “/big-win/”. You’ll want to make sure, of course, that this URL has an existing page before the public uses your form.
The “redirect here on error” field also expects a URL, but is prefilled with “/error”, which is probably best left as is unless you have something particular you’re trying to make happen in error situations.
You have several toggles available to set up the form. For this quick walkthrough, we won’t worry about those.
Inside the form #
There are two blocks that have to go in each form: the pznonce block and the submit button (future releases will not need a submit button in some cases, but for now, all forms are conventionally submitted with a button click). The pznonce block is automatically inserted as soon as you edit within the form block, so you don’t need to worry about remembering to put it there.
The PZ nonce button is a security feature and is not visible to the user on the front end of the site. It uses a WordPress capability where the server creates a random sequence and letters (the “nonce”) and this number travels with the block to the form on the front end. The nonce is silently sent back to the server when the form is submitted and ensures both that this is the user to whom the form was sent and that the nonce was legitimately issued by the correct server (not forged by an attacker).
While the pznonce block requires no configuration, the PZ Submit button has a couple of configurable items, found in the right-hand block inspector panel:
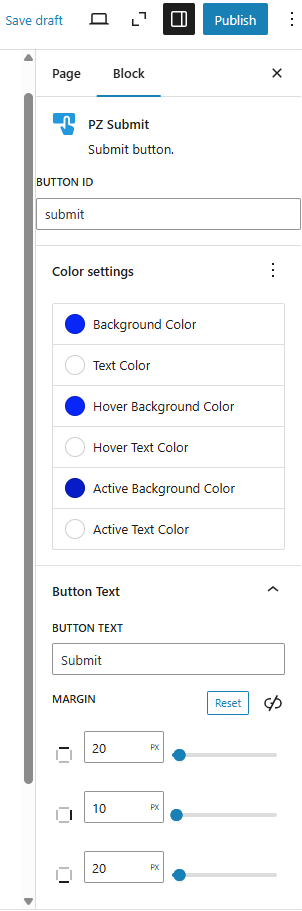
All these configurations are optional, but the odds are good you’ll want to change the button colors.
Adding an actual field #
Now that we have the basic chores out of the way, we can build whatever kind of form we’d like by adding form field blocks.
For this introduction, let’s just add a single text field using the pzTextField block.

If you click on the block, the inspector panel on the right will show you several options you may want to change. We’ll have more to say about using standard fields and how they can be configured in the next section.
At this point, if you publish or save your page and view it on the front end of the site, you’ll have a working form that will accept user intput in the text field and store it to whatever field you’ve assigned it to. Even if you do nothing else, this will work as a form that forwards email to the address you supplied in the PeakZebra settings and stores the data in the PeakZebra database.


